
How Shopify customization works, from no-code to custom code
You can customize Shopify in five layers: theme settings and the theme editor, custom data with metafields, apps and app blocks, theme code written in Liquid, and checkout or headless builds. Start with the lowest layer that solves the problem, because each step up adds cost, maintenance, and risk when the theme updates.
The original version of this post mixed plan pricing, an app recommendation, and claims about “three product categories” that were never accurate. This rewrite is a practical map for US merchants who want their store to look and work a certain way and need to know which tool does the job. Facts come from the Shopify Help Center and Shopify developer documentation, checked as of October 2026. PROSeCommerce, part of PROS Global in San Diego, designs and develops Shopify and Shopify Plus stores, and the order below is the one we use when scoping customization work: settings first, code last.
| Layer | What you can change | Skill needed | Risk when the theme updates |
|---|---|---|---|
| Theme editor and settings | Layout, sections, blocks, colors, typography, content | None | Low |
| Metafields and metaobjects | Product specs, size charts, care notes, custom content types | Admin setup | Low |
| Apps and app blocks | Reviews, subscriptions, bundles, search, loyalty | Configuration | Low to medium (scripts, speed) |
| Theme code (Liquid, CSS, JavaScript) | Anything the theme editor cannot do | Developer | High if the theme is updated |
| Checkout editor and headless | Checkout branding and apps, fully custom storefronts | Partner or in-house developers | Varies; plan-dependent |
Before you customize: back up and set a goal
Shopify’s theme editor documentation recommends duplicating your theme before customizing it, so you can discard changes and start again. Do that every time, and name the copy with the date and purpose.
Then write down the outcome you want in one sentence. “Show care instructions on every product page” leads to metafields. “Make the store look more premium” leads nowhere until it is broken into specific changes. Clear goals keep the work in the cheapest layer that solves the problem.
Customize with the theme editor
The theme editor lets you change your store’s content, layout, typography, and colors through sections and settings, without code, with a live preview. Open it from Online Store > Themes > Edit theme, then choose a template such as the home page, a product, or a collection from the drop-down.
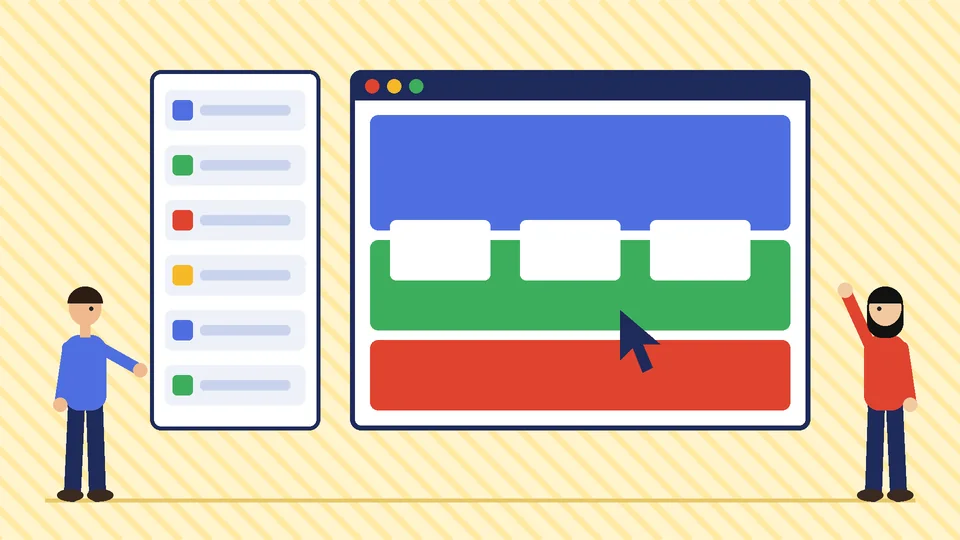
Sections and blocks explained
A section is a horizontal part of a page, such as a slideshow, featured collection, or email signup. Blocks are the pieces inside a section, such as a heading, image, button, or text. According to Shopify’s sections and blocks guide, as of October 2026:
- Each template can have up to 25 sections and up to 1,250 blocks across those sections.
- Blocks that support nesting can go up to eight levels deep.
- There are three block sources: section blocks defined for one section, theme blocks that the theme defines and can reuse or nest, and app blocks that let you place an app’s feature exactly where you want it.
You can rearrange, duplicate, hide, rename, and copy blocks between compatible sections. Sidekick, Shopify’s built-in assistant, can also add a section your theme already includes when you ask it to from the theme editor.
What the editor can do depends on the theme. Two stores on different themes will see different sections, so check your theme’s documentation before assuming a feature is missing. If your theme feels limiting, our guide to Shopify themes covers how to compare free and paid options.
Global theme settings
Theme settings control store-wide choices: color schemes, fonts, button styles, product card layouts, and cart behavior. Change these before you touch individual sections. A consistent color scheme and two well-chosen fonts do more for a premium feel than a dozen custom sections.
Add custom data with metafields and metaobjects
Metafields extend Shopify’s built-in data, such as products, variants, customers, and orders, with your own fields. Shopify’s metafields documentation gives examples like care instructions for apparel, dimensions for furniture, recommended ages for toys, and pop-up size charts.
Setup has three steps:
- Add a metafield definition in Settings > Custom data, such as “Material” or “Burn time”.
- Add values to products or variants, one by one or in bulk.
- Connect the metafield to a section or block in the theme editor using dynamic sources.
Dynamic sources need a theme that supports JSON templates, which most current themes do. Category metafields go further: when you assign a standard product category, Shopify suggests attributes like size, color, fabric, or neckline. Structured attributes also feed filters, so the same data improves search and SEO. Our Shopify SEO checklist explains why consistent product attributes matter.
Metaobjects are the next step: reusable content types such as designer profiles, ingredient lists, or store locations that you create once and reference from many products or pages.
Extend features with apps and app blocks
Apps add features the theme does not include, such as subscriptions, reviews, loyalty programs, or advanced search. Modern apps use app blocks or app embeds, which you place and remove in the theme editor instead of pasting code into theme files.
Two cautions apply. Every app that adds storefront scripts costs page speed, and two apps doing the same job, such as two review widgets, waste money and slow product pages. Audit apps every quarter and remove leftovers. Our guide on how to speed up your Shopify store includes an app cleanup checklist. When an app needs to sync data with an ERP or warehouse system, treat it as an integration project, as described in our Shopify integration guide.
Edit theme code when the editor is not enough
Shopify themes are built mostly with Liquid, Shopify’s templating language, plus HTML, CSS, JSON, and JavaScript. You open the code editor from Online Store > Themes, then the theme’s menu and Edit code. Edit the code only if you understand HTML and CSS and have a basic grasp of Liquid.

Shopify’s code editing guide includes several warnings worth repeating, as of October 2026:
- If your code changes are incompatible with a theme update, they are removed in the updated copy. Shopify advises editing code only when an app or the theme editor cannot make the change.
- You can only edit a paid theme’s code after you buy it, including with the AI code generator in the theme editor.
- Theme Check flags errors as you type, such as parser-blocking scripts or missing translation keys.
- The Timeline view can restore earlier versions of a single file, but it cannot restore a whole theme or recover deleted files, and asset files have no Timeline history.
For anything beyond small CSS tweaks, developers usually work on an unpublished copy of the theme with version control and Shopify CLI, then publish after testing. That workflow is the difference between a controlled release and a broken product page on a Saturday.
Customize checkout and customer accounts
Checkout is not edited through theme code. The checkout and accounts editor handles branding, such as logo, colors, fonts, and background, plus apps on checkout, thank you, order status, and customer account pages. As of October 2026, Shopify’s checkout customization page lists this split:
| Checkout customization | Basic plan or higher | Shopify Plus |
|---|---|---|
| Checkout and accounts editor | Yes | Yes |
| Apps on thank you and order status pages | Yes | Yes |
| Apps on information, shipping, and payment pages | No | Yes |
| Checkout Branding API | No | Yes |
If your plans depend on custom fields, offers, or logic inside the checkout steps, factor the Plus requirement in early. Our comparison of Shopify Advanced vs Plus covers the other differences.
When headless Shopify makes sense
A headless build keeps Shopify for products, cart, and checkout but replaces the theme with a separate front end. Shopify’s headless documentation describes Hydrogen as Shopify’s headless toolkit, built on the Storefront API, which serves products, collections, search, and the cart before handing customers to checkout.
Headless is a fit for brands with in-house developers, content-heavy experiences, or several front ends such as a web store and a native app. It is rarely the right first step. You take on hosting choices, more code to maintain, and app compatibility work, because many App Store apps are built for themes. Most merchants get further with a well-configured theme, metafields, and a few targeted code changes.
Matching the goal to the right method
| Goal | Best first method |
|---|---|
| Change colors, fonts, or layout | Theme settings and theme editor |
| Show specs, size charts, or care notes per product | Metafields with dynamic sources |
| Add reviews, subscriptions, or loyalty | App with app blocks |
| Build a unique product page layout | New product template in the theme editor, code only if needed |
| Add custom logic or integrations | Custom app or theme code by a developer |
| Brand the checkout | Checkout and accounts editor |
| Add fields or offers inside checkout steps | Checkout apps on Shopify Plus |
| Fully custom front end | Hydrogen or another headless stack |
Hiring help without losing control
If the work needs code, hire someone who can explain where each change lives and how it survives theme updates. Ask for a written list of edited files, a staging copy, and handover notes. Our guide on how to choose the best Shopify developers lists the questions to ask, and our Shopify development services page explains how we scope custom theme and app work.
After launch, keep customizations healthy. Re-test custom sections after theme updates, review apps each quarter, and keep a changelog. Our Shopify website maintenance guide sets out a monthly routine.
Frequently asked questions
Can I customize Shopify without coding?
What is the difference between sections and blocks in Shopify?
Will editing theme code break theme updates?
Can I customize the Shopify checkout?
What are Shopify metafields used for?
When does a headless Shopify build make sense?
Next steps
List the three changes you want most, map each one to the lowest layer in the table above, and duplicate your theme before you start. Do the theme editor and metafield work yourself, then bring in a developer only for what is left.
If you want a second opinion on what needs code and what does not, PROSeCommerce can review your theme, apps, and goals and give you a customization plan that stays maintainable through future Shopify updates.